With just three weeks left in Africa, I realized I hadn’t finished posting about Zanzibar! oops.
For the last leg of my holiday, I wanted to spend a few days at a nice beachfront resort, but I chose to avoid the northern beach area because it’s said to be overdeveloped and overpriced. I found a nice looking place at the southern end of the island that was a little more than I like to spend on a hotel, but I thought it was a reasonable splurge for a resort right on the beach. It just goes to show that photo angles are everything. Sadly, I was fooled once more by stunning ocean photos that only showed high tide, but turned out to be a seaweed covered strand when I arrived a few hours after the low-tide mark.
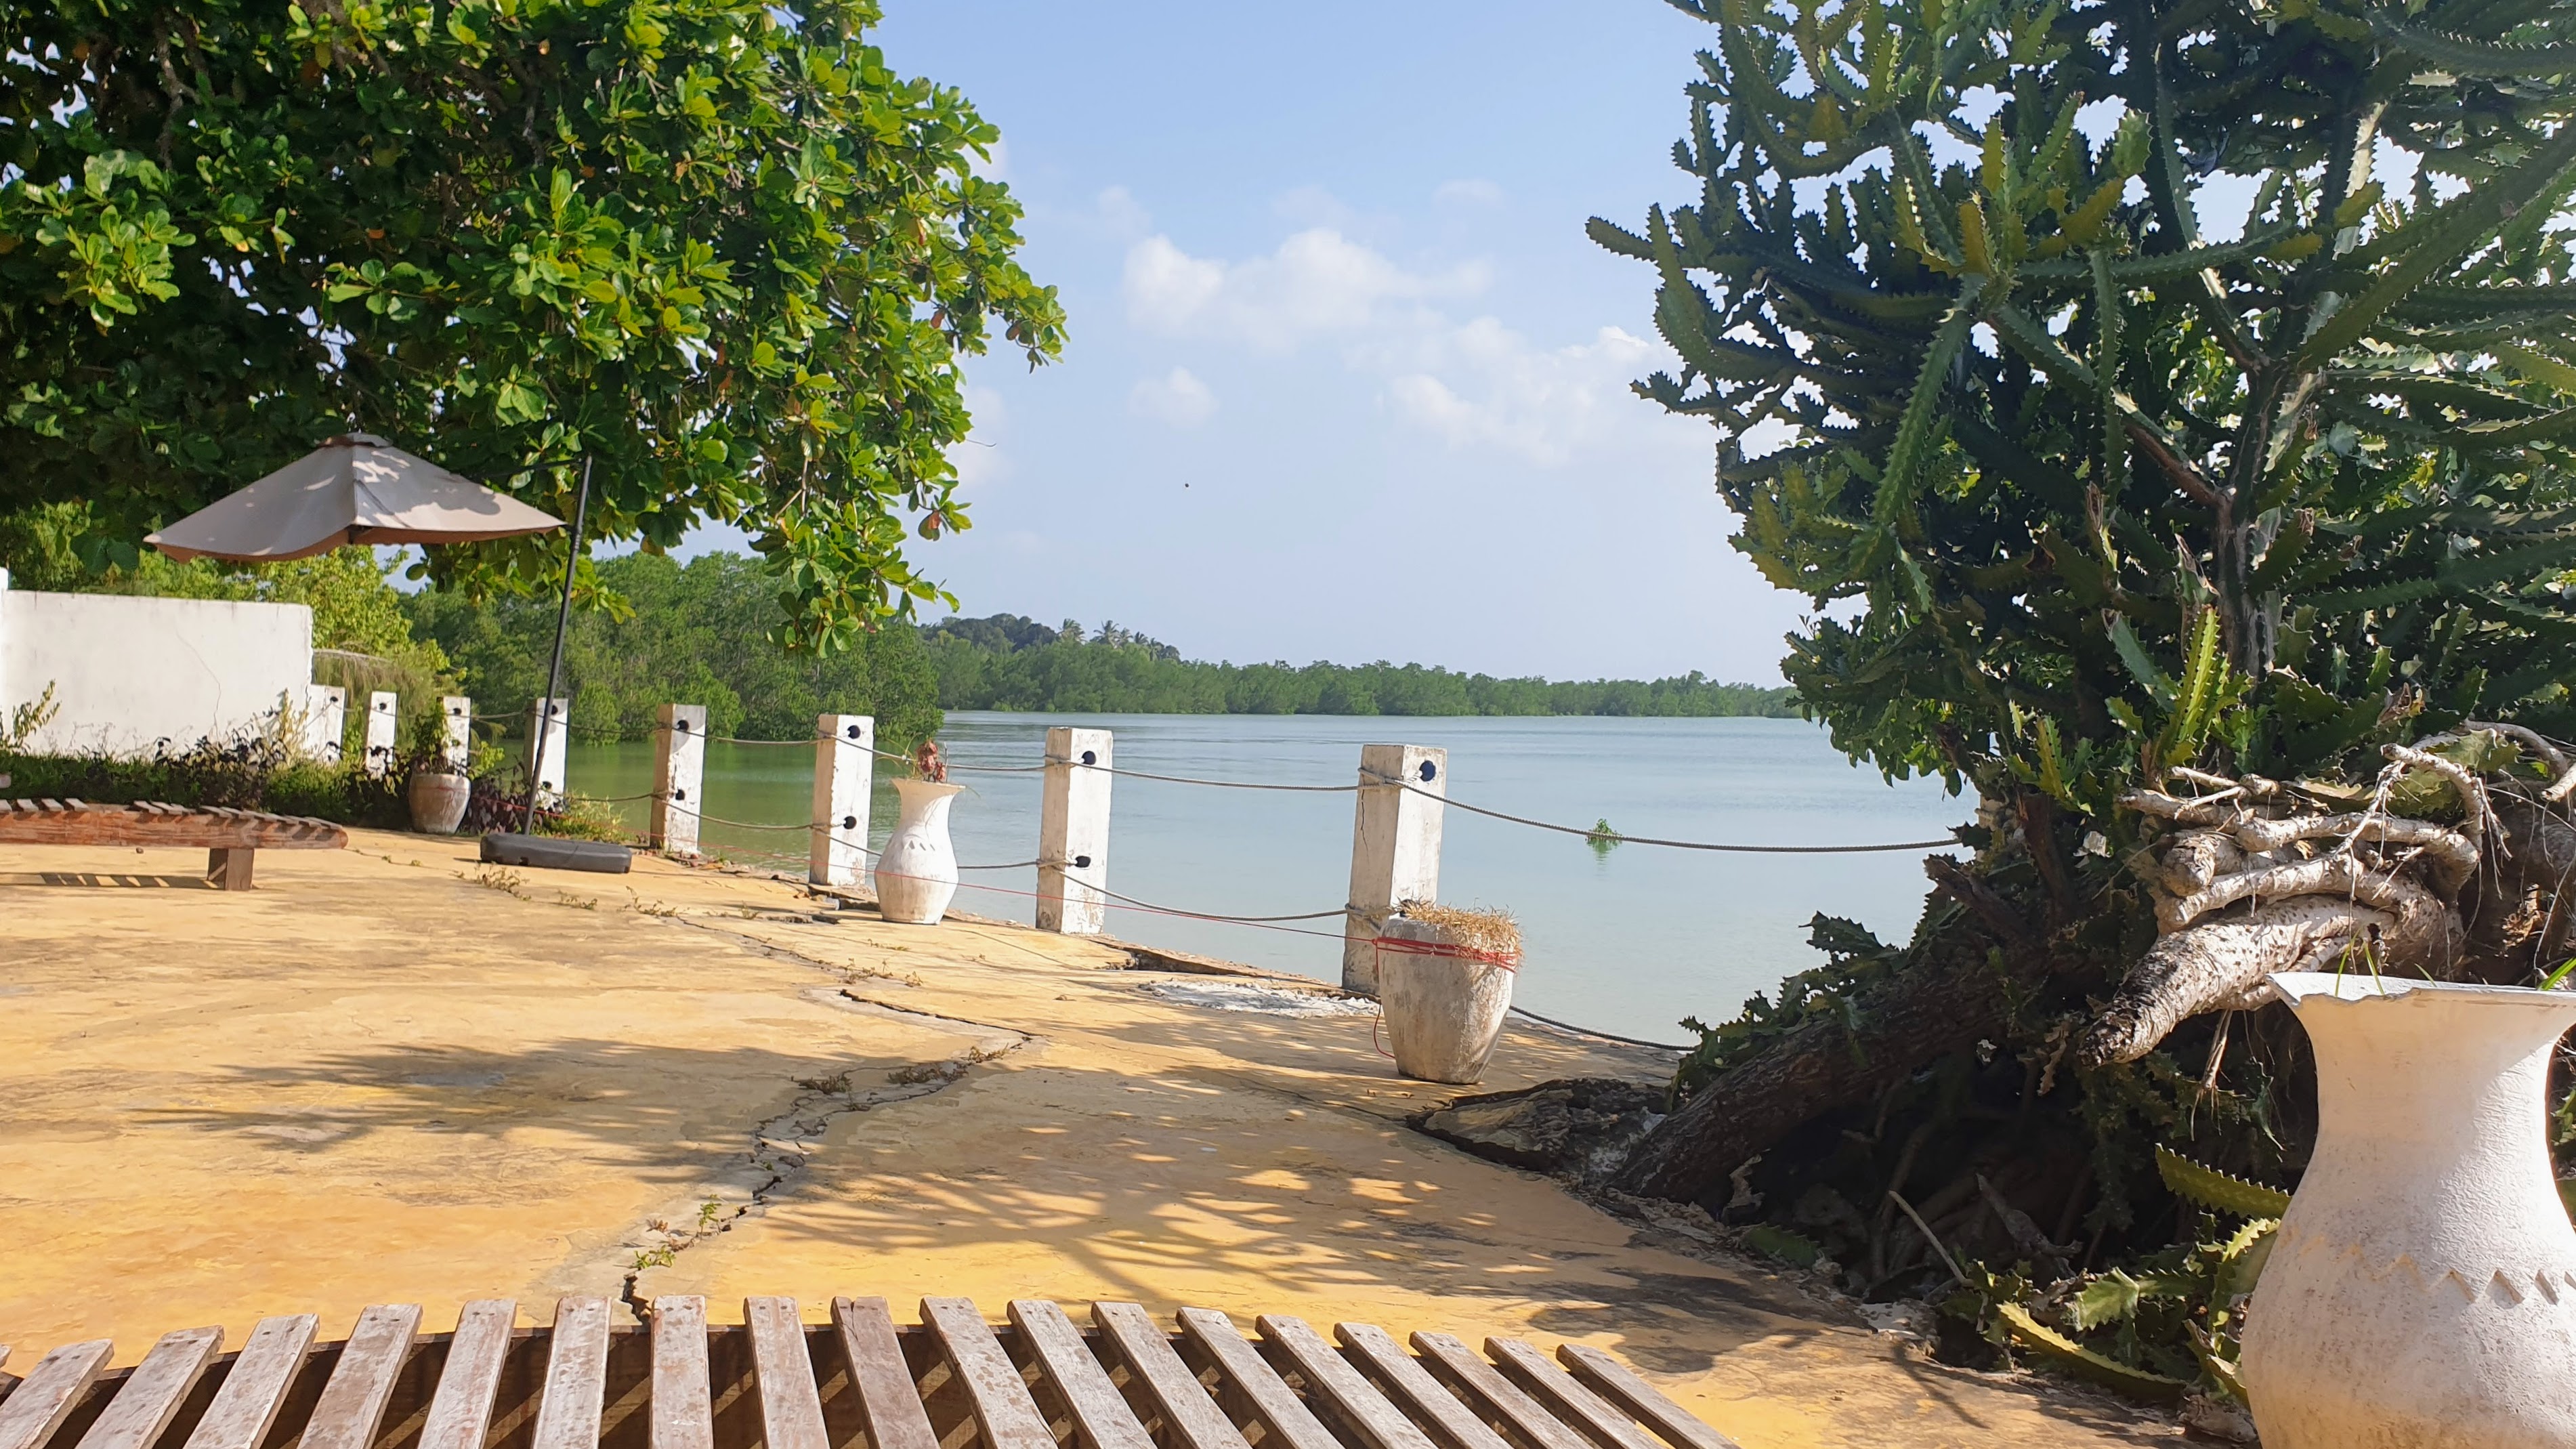
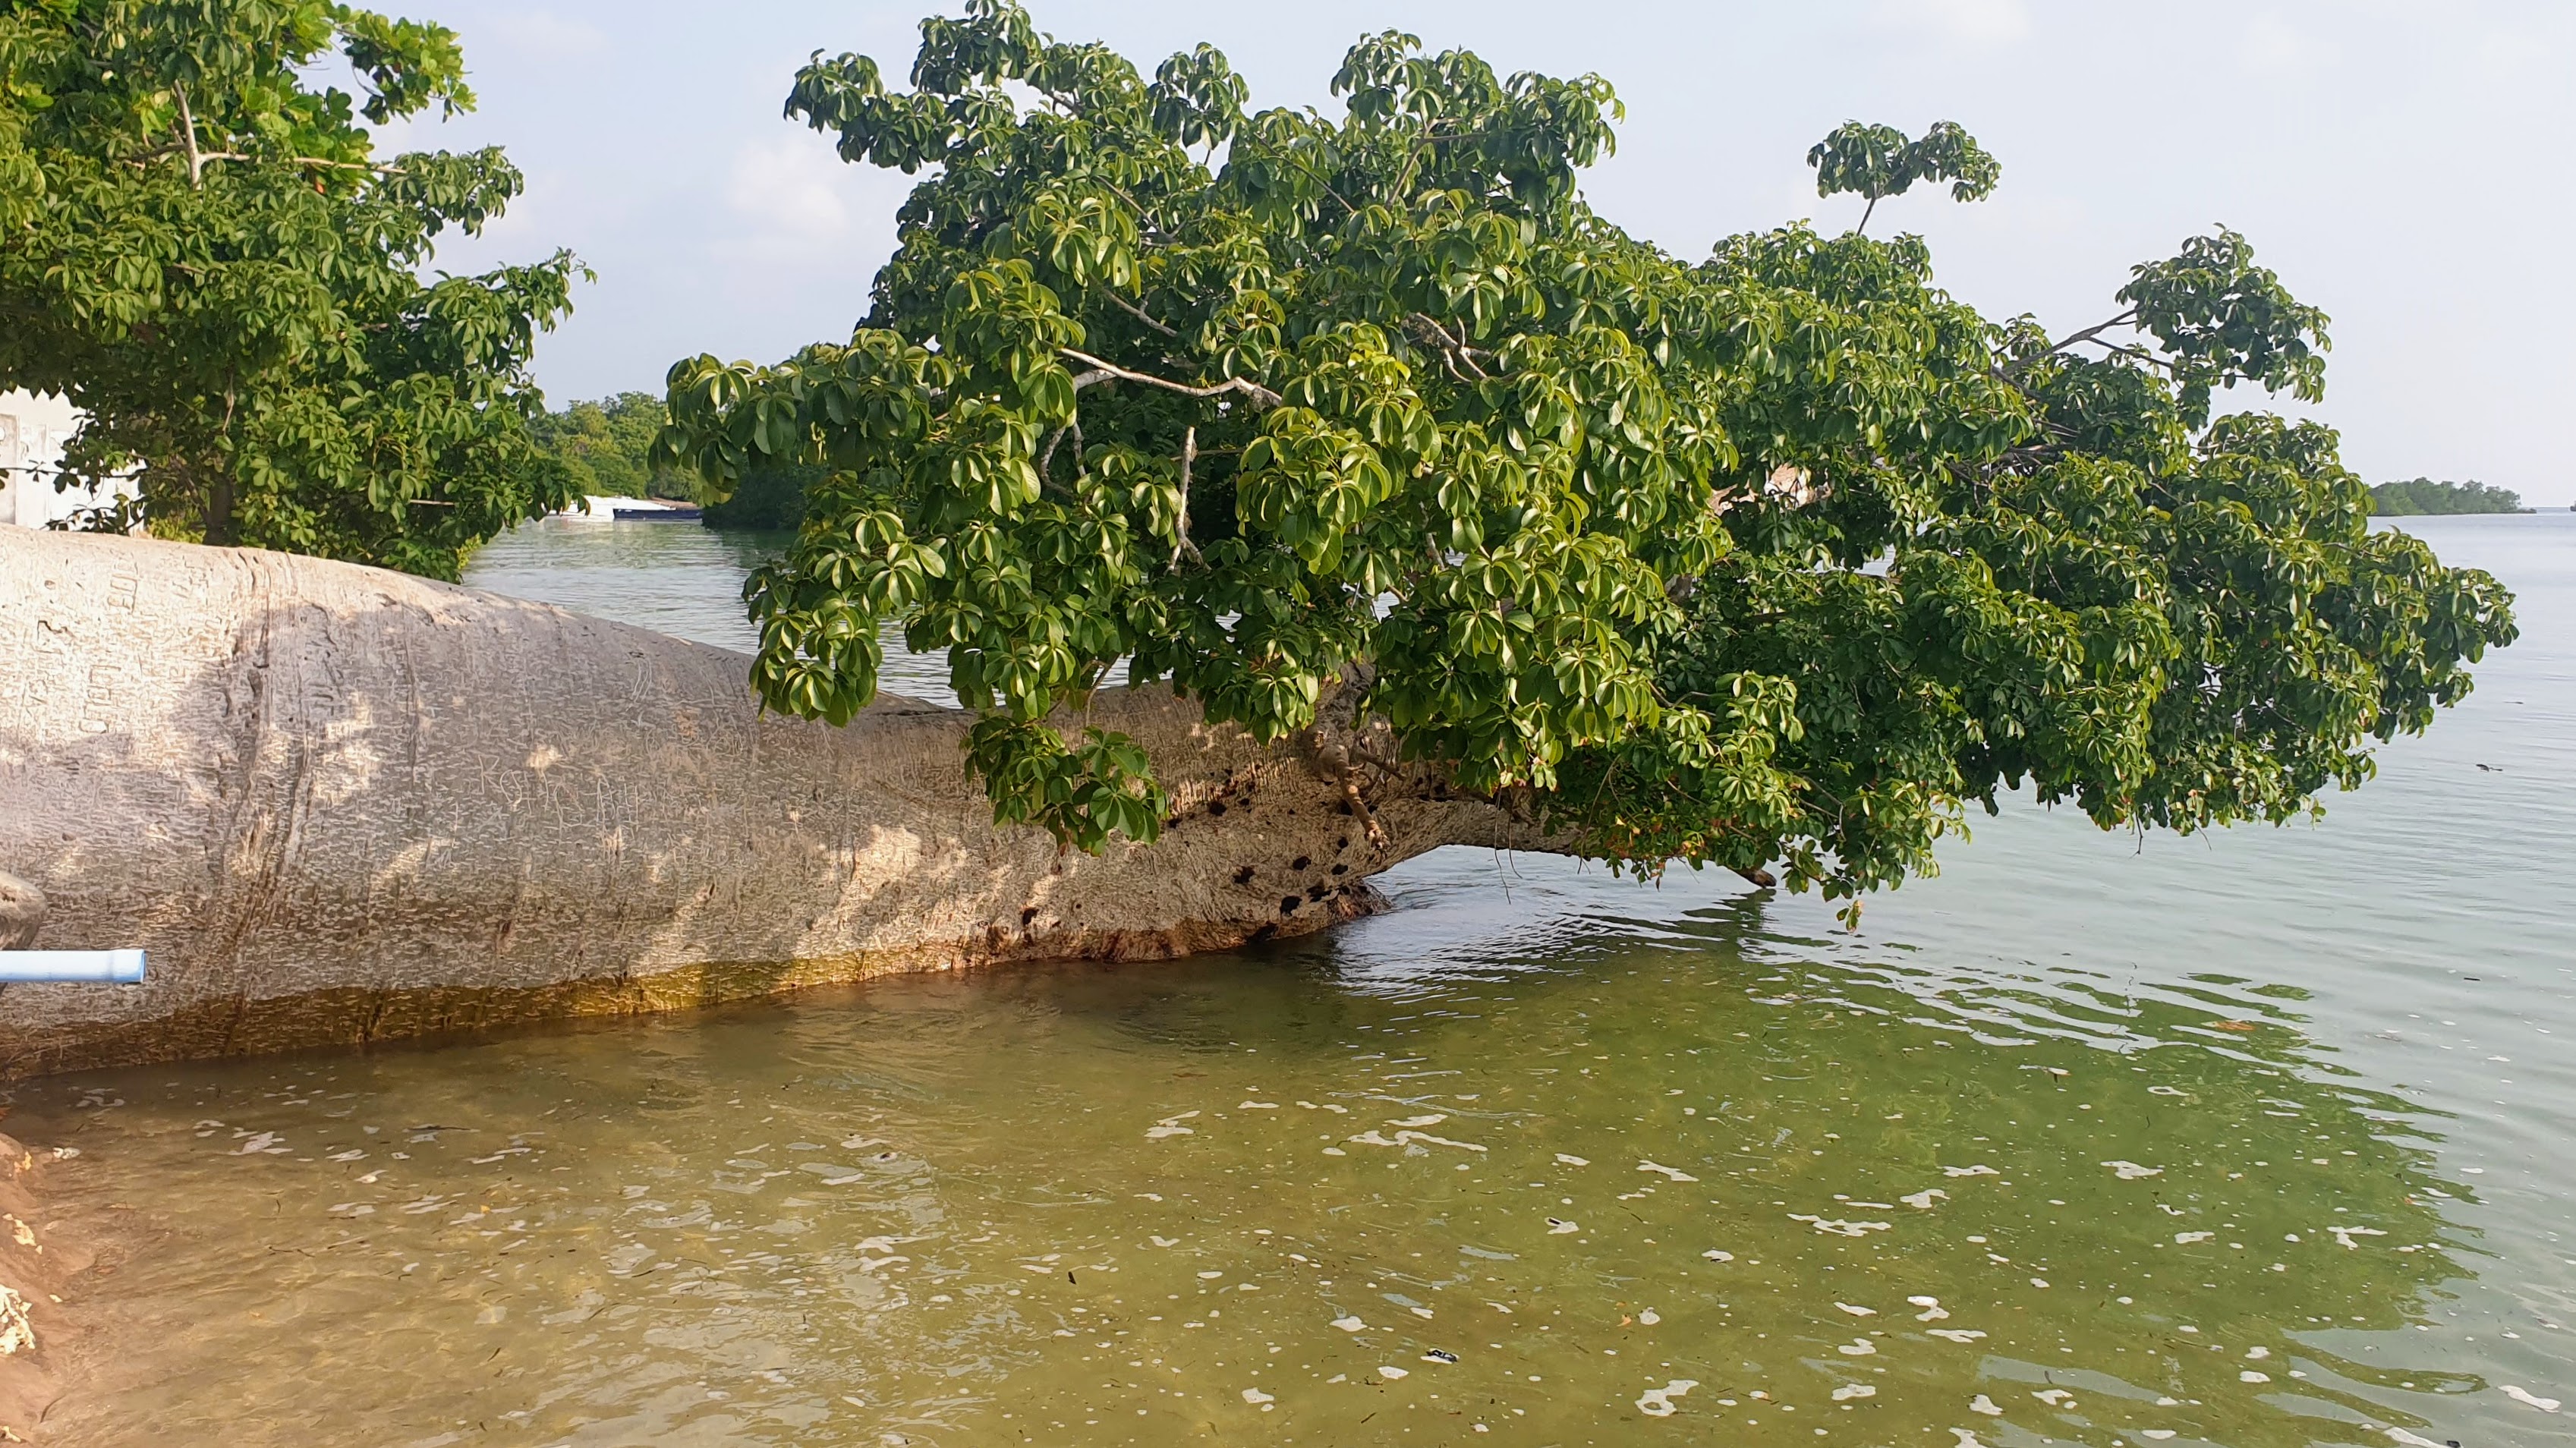
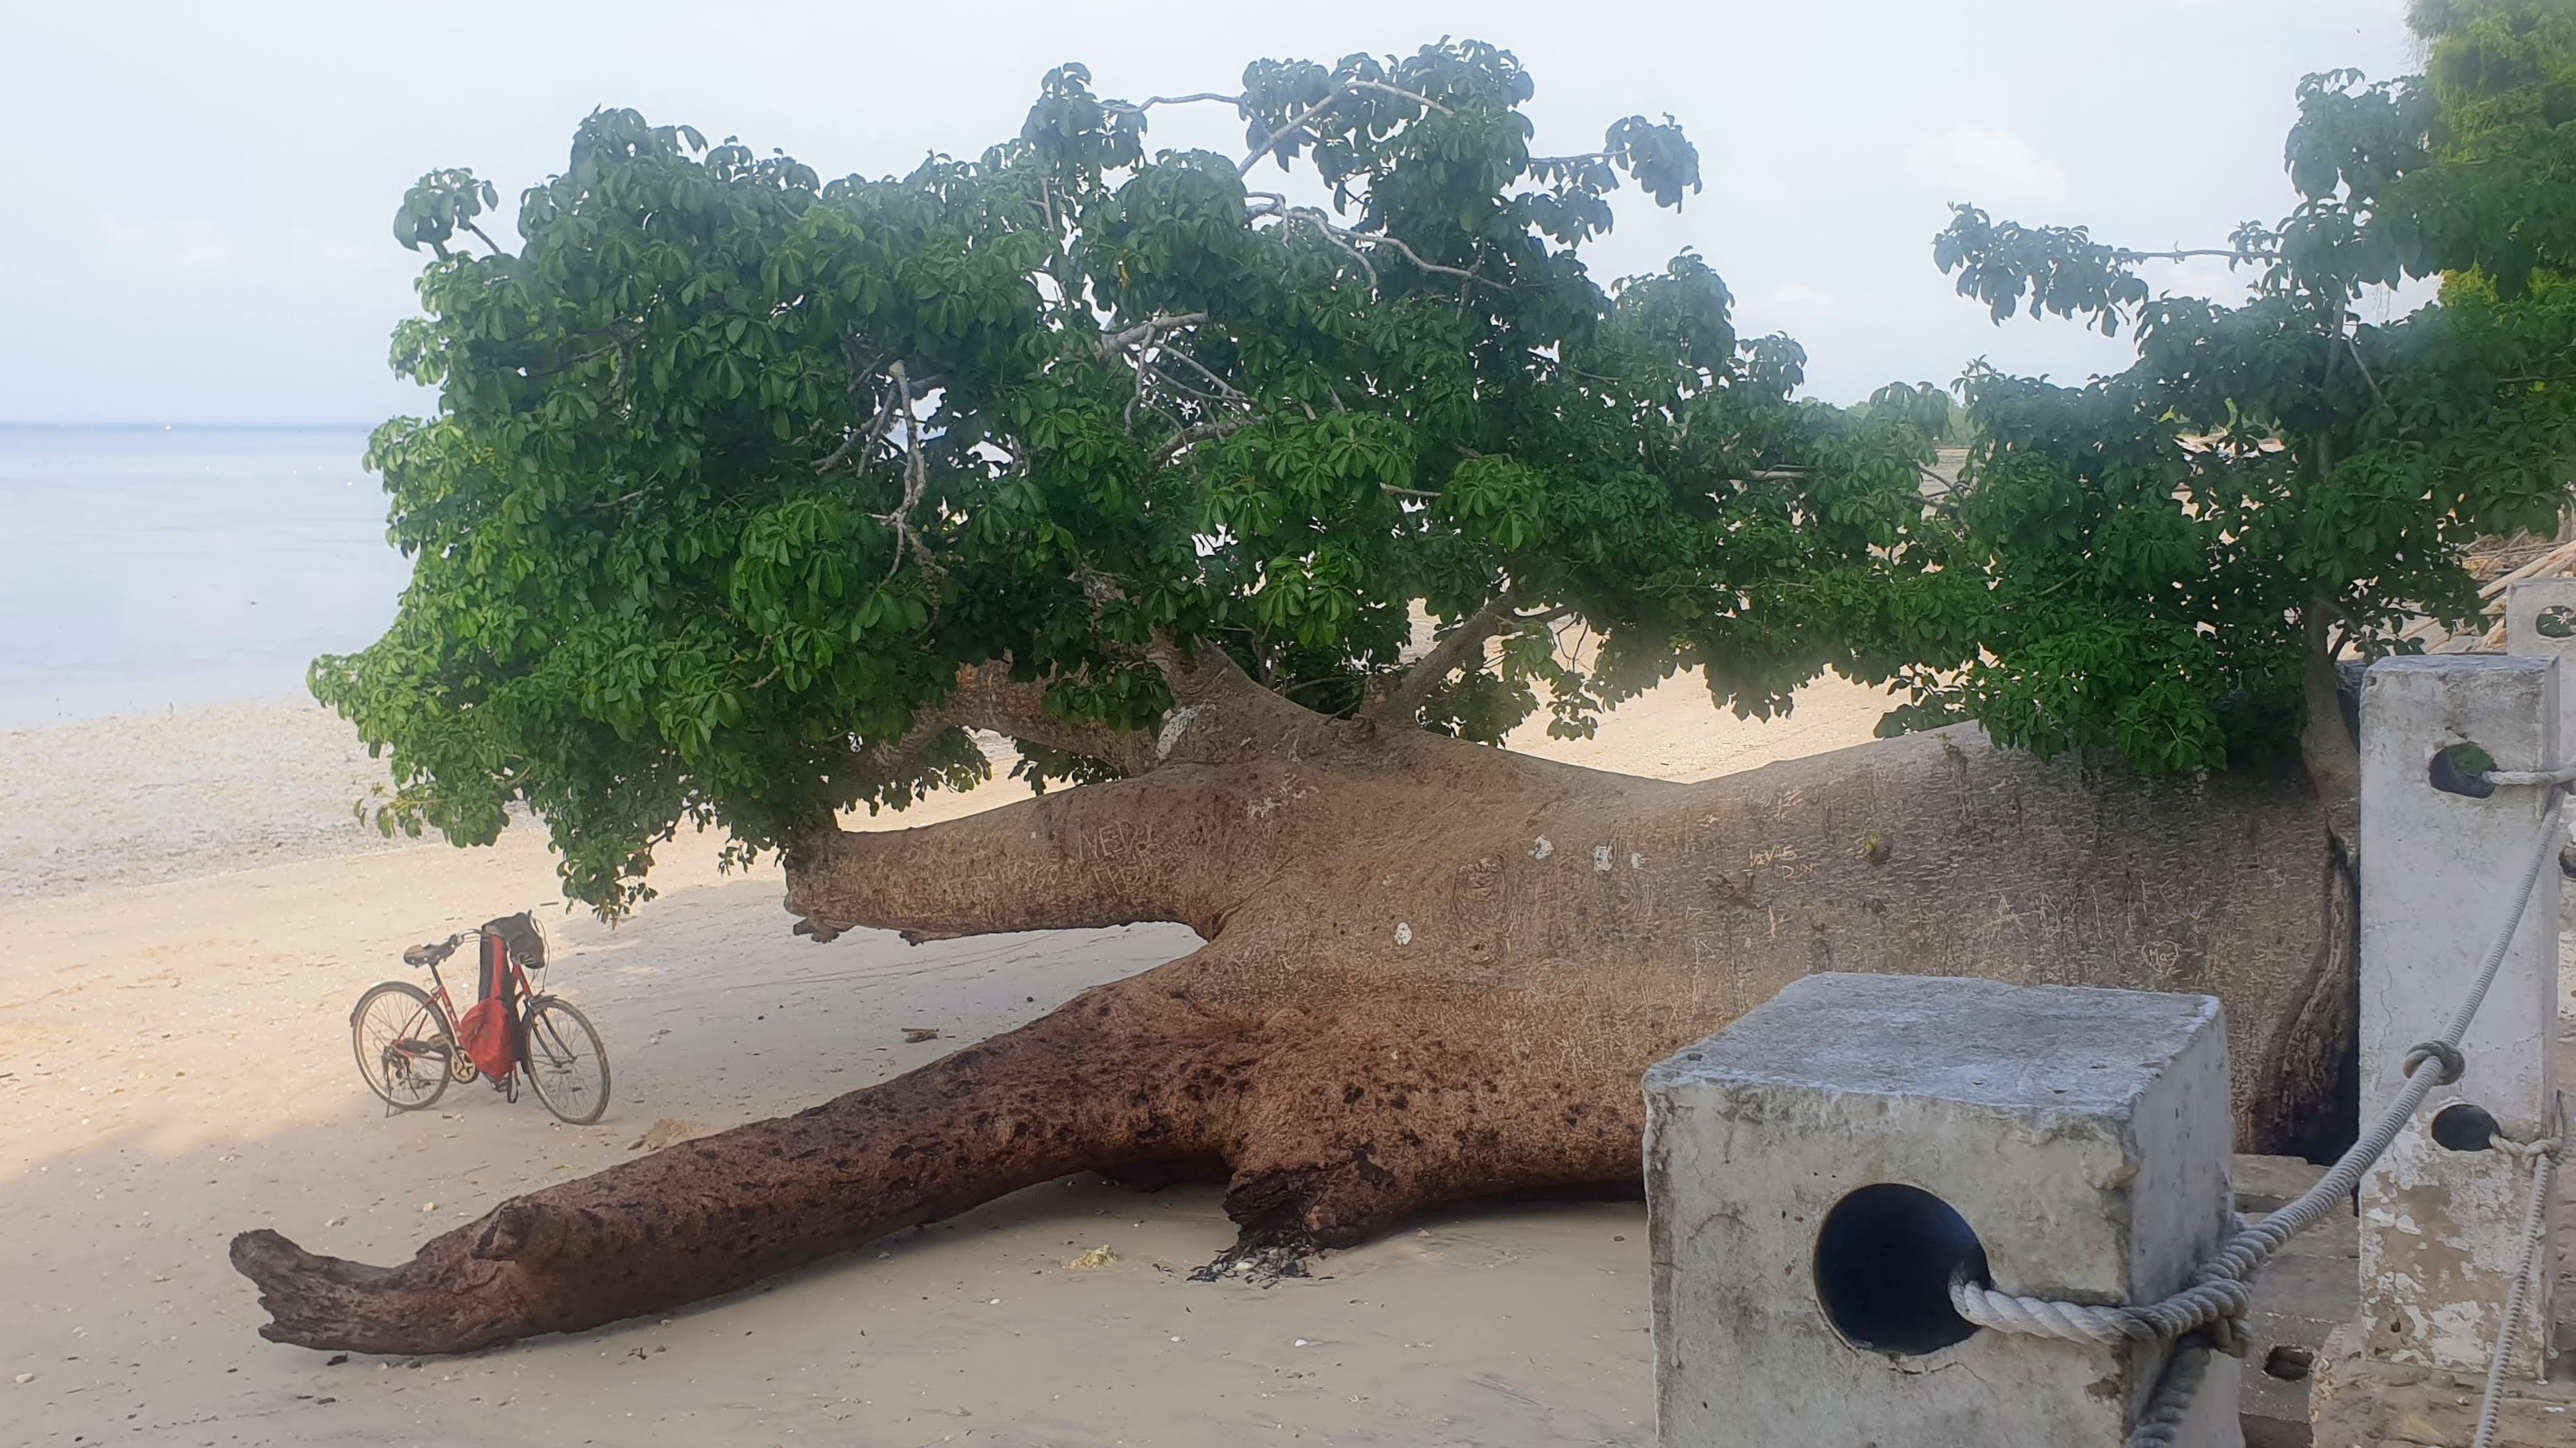
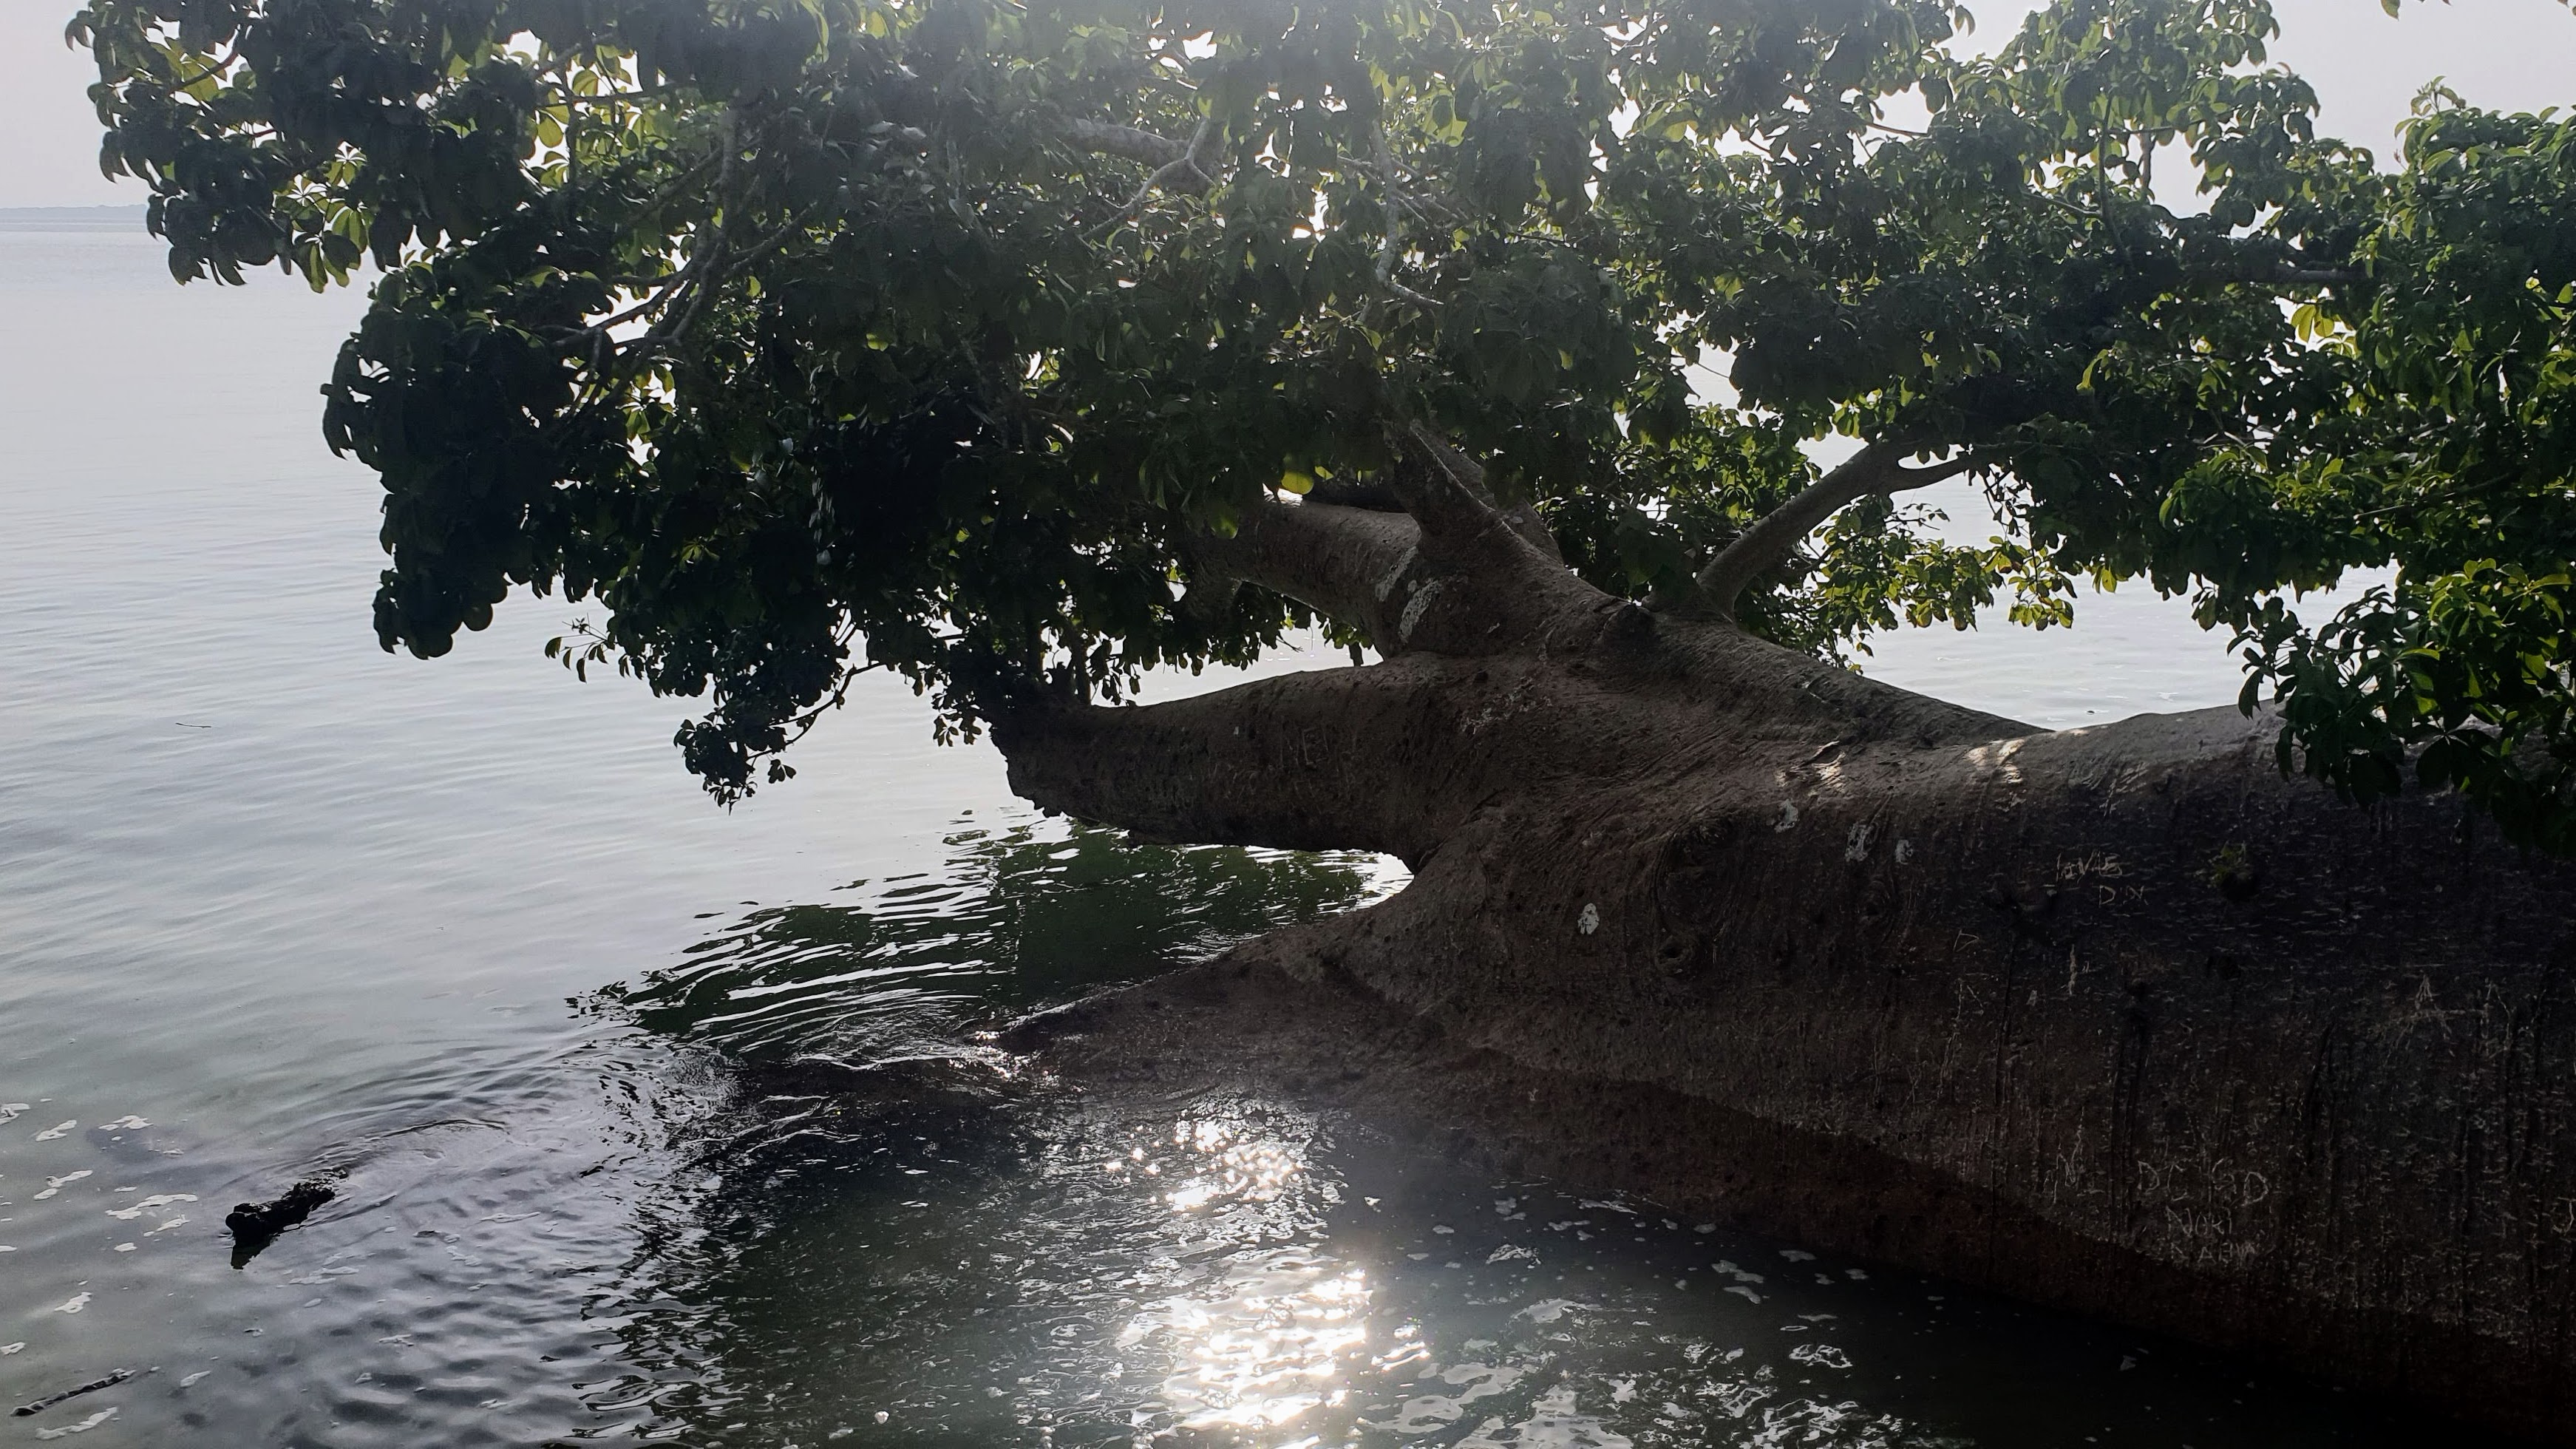
By my second day at the resort, I came to the conclusion that it wasn’t beach it was a mangrove. The tides on Paje had been a lot, but these were absolutely wild. At high tide, the water came right up to the edge of the hotel property and the steps that would lead to the “beach” led straight into the water. At low tide, the water vanished to the horizon leaving mucky, algae covered wetlands behind. Mangroves are an amazing ecosystem, beautiful in their own way, but it’s not the thing you want to get when you’ve planned for the turquoise blue Indian ocean at your door.
The blissful quiet that greeted me on arrival turned out to be an anomaly, possibly caused by a combination of the heat of the day and low tide. The restaurant played music all day with a very heavy bass like it was trying to be a night club. There was very limited seating around the pool and waterfront, and almost none of it had any shade. In addition, the geography of the bay meant there was almost zero wind, meaning the air was hot, humid, and stagnant.
The fresh ocean breeze had made Stone Town and Paje bearable in the sun and downright pleasant in the shade. The resort didn’t even have fans in the restaurant or public seating areas! All I wanted was to lounge in a chair on the beach and listen to the soothing sounds of waves, but instead I got a burning hot chair in the scorching sun next to a tidal flat and the wannabe club-groove sounds of the empty restaurant.
The resort was very picturesque, but quite off the beaten path. There was nothing around but local homes, I didn’t even see any local shops on the way in where I could buy snacks or water. I had no choice but to eat all my meals in their restaurant or pay the exorbitant fees for local taxis to drive me to a place with other restaurants. I spent the heat of each day in my room. I tried to go for a cooling swim the first afternoon but discovered that the intense sun had warmed the hotel pool to bathwater temperature, so even if I went in using my UV blocking rash guard and parasol, the water was far from refreshing. The ocean was similarly warm, which was nice in the mornings and evenings, but quite unpleasant from about 10am to 6pm.
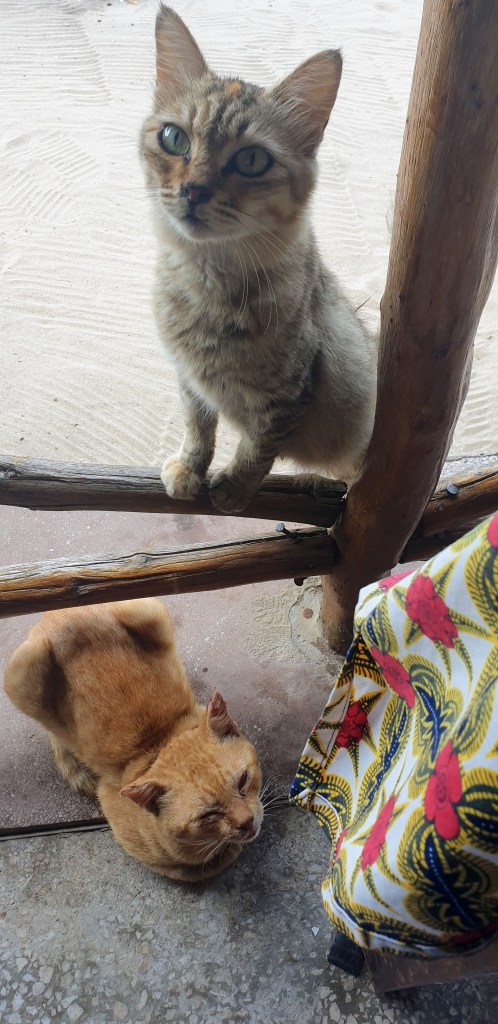
Despite all these issues, the staff were very kind and attentive, the rooms were clean, they sprayed my room for bugs every evening to make sleeping more comfortable. The restaurant was nothing to write about. I got the impression it was very generic tourist food designed to be palatable to a variety of cultural tastes. It was … palatable. There were cats everywhere! I wish I weren’t so allergic because they were very sweet and social, sometimes to the point of being invasive. They surrounded me at every meal begging for scraps, and one even jumped up on my table to try and get at my food.
There were a lot of local boats just to the right of the resort. I couldn’t find anything there on Google Maps, but obviously a local fishing village. The boats came and went with the tides, and the people spent the evening swimming and enjoying the water. One of the upsides to this remote and isolated resort was it’s lack of tourist marketing. It was the only place I went on the island where locals were just enjoying themselves and not trying to sell, commodify, or perform their culture.
Sunsets are the reason to spend a night in this place. The hours spent watching nature’s light show almost made up for the rest of it. The setting sun made beautiful colors: gold, rose, blue, and lavender. There were scads of little crabs scuttling in the retreating tide and cranes hunting them. The hulls of the fishermen’s dhows became black silhouettes resting in inches of water.
The first video is a time lapse of a single sunset, it’s less than a minute so don’t give up after the sun goes down because there’s more colors coming!
SOUND ON This next video is in real time so as to share the sounds of the sea and wildlife with you.
As an American/native English speaker, the word “souvenir” has always been associated in my mind with consumerism and with the temporary (and often disrespectful) tourist population. I spent part of my childhood living in Panama City, Florida, which was a huge tourist destination famous for it’s sparkling white sand beaches. Whenever my family would go out to enjoy the seaside, we were beset by sellers of overpriced fake key lime pie and tchotchkes made of seashells (which probably weren’t even from the local beaches). We joked about needing t-shirts that said “I’m not a tourist, I live here.”
I am never going to be the person who buys the shell encrusted picture frame or the novelty coffee mug, but I do like having unique keepsakes of my international homes as well as gifts to bring back for friends and family. For my friends, I’ve been gradually accumulating tidbits made from unique Senegalese materials and ingredients by small local businesses, but for myself I found an ethical, local, environmentally sound silversmithing class which seemed like a perfect way to combine a new experience with a physical representation of my tenure in Senegal.
The Existential Crisis Continues
Before I tell you about my cool souvenir experience, I need to talk some more about the (possibly culture shock induced) ongoing existential crisis that is living face to face with the legacy of the colonial and capitalist systems which benefit some at the expense of many. “Kaine, can you talk about Africa without going on about the ethics of it all? Can’t you just tell us the cool story?”, Nope. At least not yet. I don’t get a break from my brain feeding me moral quandaries, so neither do you. But the cool souvenir experience ties into the ethical discussion, and also I am trying my best to make it more “huh, I never looked at it that way” an less “moral philosophy lecture”, so hang with me.
The Global Supply Chain of Souvenirs
I noticed in Zanzibar that a lot of pan-African tourist goods on offer were not actually Tanzanian, being the same exact tropical island stuff I found in SE Asia complete with “Made in Thailand” tags. Even the more “Africa-centric” items like big 5 safari animal themed goods, and Maasai themed goods were not really helping the local economy since the raw materials and production were almost certainly outsourced, while most of the shops are owned by foreign investors. (the exception seemed to be hand painted artwork, which you can often see the artist create on the street)
It’s harder to tell how much of that is the same here in Senegal because Dakar is so much bigger than Stone Town, but it has been a challenge to find good souvenirs and gifts here that are genuinely unique and local. I’ve found that the majority of markets often only sell staples for living, and that many gift oriented markets offer imported items, while tourist oriented markets offer mass produced “pan-African” souvenirs which may or may not be made in China or by exploited workers in neighboring African countries. (the exception seems to be bespoke clothing and furniture, but these are way outside of my luggage size/budget limits).
Toubab Spaces
I only realized here in Senegal that the French word “souvenir” means memory in English, and I really love it because I am far more interested in a memory than a thing. My collection of physical souvenirs are all attached to stories of the experiences I was on when I got them. I’ve been trying to find memorable experiences in Senegal, to see, learn, touch, taste, listen and do things that help me to understand this place and people, but I have noticed that every time I find myself interested in or excited about a product, place, or event it’s probably actually owned by Toubab (the Wolof word for white people).
For example, I found an artisan chocolate shop which uses local fruits, grains, and spices, then I met the Belgian dude who is the half-owner. The woman who owns the other half is Belgian/Congolese, so at least there’s some Africa in there, but not Senegalese, and most Senegalese people couldn’t afford their chocolates anyway. The bar I go to is run by a French/Lebanese man who is super cool, and very dedicated to Dakar, but a foreigner nonetheless. My favorite restaurants are owned by foreigners (Italian, Mexican, Indian) and not just because I love those foods. I really like Senegalese food, but it’s challenging to eat at their restaurants for practical reasons like language barrier (they may not speak French), portion sizes (Senegalese meals are often cooked for groups to share) and “Senegal time” which means it could take 2 hours from the time you order to the time your food arrives.
It’s almost impossible for me to find products and activities that I want to enjoy which are owned and operated by Senegalese. I love to eat at the Senegalese faculty restaurant on campus because they are patient with my bad French, have single serving plates, and respect the fact that the faculty don’t have 2 hour lunches, but I don’t go there unless I’m already on campus. I suspect that Senegalese own and operate lots of small businesses, like all the corner stores, fruit stands, and small bakeries, as well as hardware stores, dry goods stores, and clothing shops, but with the exception of the occasional corner store run, I don’t shop at those places because I don’t need most of the things they sell other than food. My grocery delivery service specializes in selling from local producers, and it’s nice to be able to support local small businesses, but it’s not a souvenir in either the English or French sense of the word.
Cultural Exchange
When I was preparing to move here, my RELO told me there would be a lot of room for cultural exchange like dance lessons, or learning local music styles, local cooking classes, and so on. I was very excited. I don’t expect people to perform their culture for me, but I have become accustomed to being able to find at least a few people (or a government sponsored program) that want to show and tell, who are overjoyed to find a tourist that takes an interest. In New Zealand, I participated in a Maori tribal tour; in Spain I went on a cookie tour of nunneries; in Ireland I went to a trad music/storytelling night in a local performer’s home; Japanese ladies taught me their summer festival dance, Korean ladies taught me a tea ceremony, one of my Chinese friends taught me how to haggle at the market for the first time ever. In Zanzibar, I got to do a Swahili cooking class with a lovely Tanzanian entrepreneur and enjoyed a tour and history lesson from another local. These experiences are always my favorite parts of a trip, and they are usually not that hard to find.
Here in Dakar, I am better off watching YouTube tutorials if I want to learn how to make attaya or thieboudienne. People seem disappointed that I can’t speak Wolof, but I can’t find a class or really any help (one person sent me a pdf of common Wolof phrases, but no pronunciation guide, so again, better off with YouTube) I didn’t move here just to learn about it from my living room. I learned more Swahili in three weeks by chatting to locals than have learned Wolof in 9 months. I am making music, but it’s with other expats… they aren’t Americans at least, and not native English speakers either which makes it all the funnier that they love playing bluegrass covers of classic American rock songs (no, man, it’s “Tex-Arkana” not ‘Turkish-cana” Texas, not Turkey). I love it, it’s so fun and a wonderful way to feel like I’m part of a community, and although it is cultural exchange of a sort, it’s not with Senegalese, which remains a source of frustration 9/10ths of the way through this adventure.
Aid, Colonialism, or White Savior-ism?
I have been struggling since my arrival with the role of foreign aid in Africa in general and the very difficult to navigate line between aid and neo-colonialism, or help and white-saviorism. I think that while there is no hard and fast rule, the general guidelines are not that different from Maslow’s hierarchy of needs. In my opinion so far, the closer to the bottom (survival) the need is, the fewer qualifiers we should put on giving it. If the man is currently starving, give him a fish. Once he’s well fed, teach him to fish, and so on. As helpers, our long term goal needs to be to help the group achieve self-sufficiency, but we may have to do some things for them on the way.
In addition, because those things cost money in our capitalist hellscape environment, that means we will have to publicize the helping to raise that money. I and every other English Language Fellow write little publicity blurbs every time we do something that improves the lives of locals so that Congress can see where the taxpayer’s money is going. However, we don’t call ourselves out by name, and we focus the story on the achievements of the locals. This is the needle we thread to help just the right amount while learning how to say, “no, we will not do that part for you” and also advertising for funding without exploiting anyone’s suffering for personal gain. Fun fact, Chidi Anagonye, the moral philosopher of The Good Place, was raised in Senegal. I feel like my ongoing moral tummyache honors the writers work.
Green and Pink: The Cool Story
The Pink House (Maison Rose)is run by an older French woman and funded mainly by a French charity organization, but it serves a very real need in the community for women escaping domestic violence and sexual exploitation. They have an embroidery workshop where local Senegalese women are employed at a fair wage to hand embroider designs for (mainly French) fashion houses which are committed to raising the quality of life for women in West Africa. It still sounds slightly like a sweatshop, but I am assured that the women are paid fairly, and that for many if not all of the women who work there, not just the money but also the work itself are a huge part of their recovery and financial independence as survivors.
The Green Wave Jewelry shop has only recently started, but their goal is to provide free 3-month training courses to women from Maison Rose, and to then employ them to make the silver jewelry and “sea plastic” home décor items that they sell. The shop is committed to using natural and recycled materials, so their silver is all recycled, the materials for the molds are washed up from the sea, and they even use ocean trash plastic in a beautiful way (sea plastic, lol). The project is designed to give the women a skill which they can not only parlay into a viable economic opportunity, but also something that can build their self-worth back up.
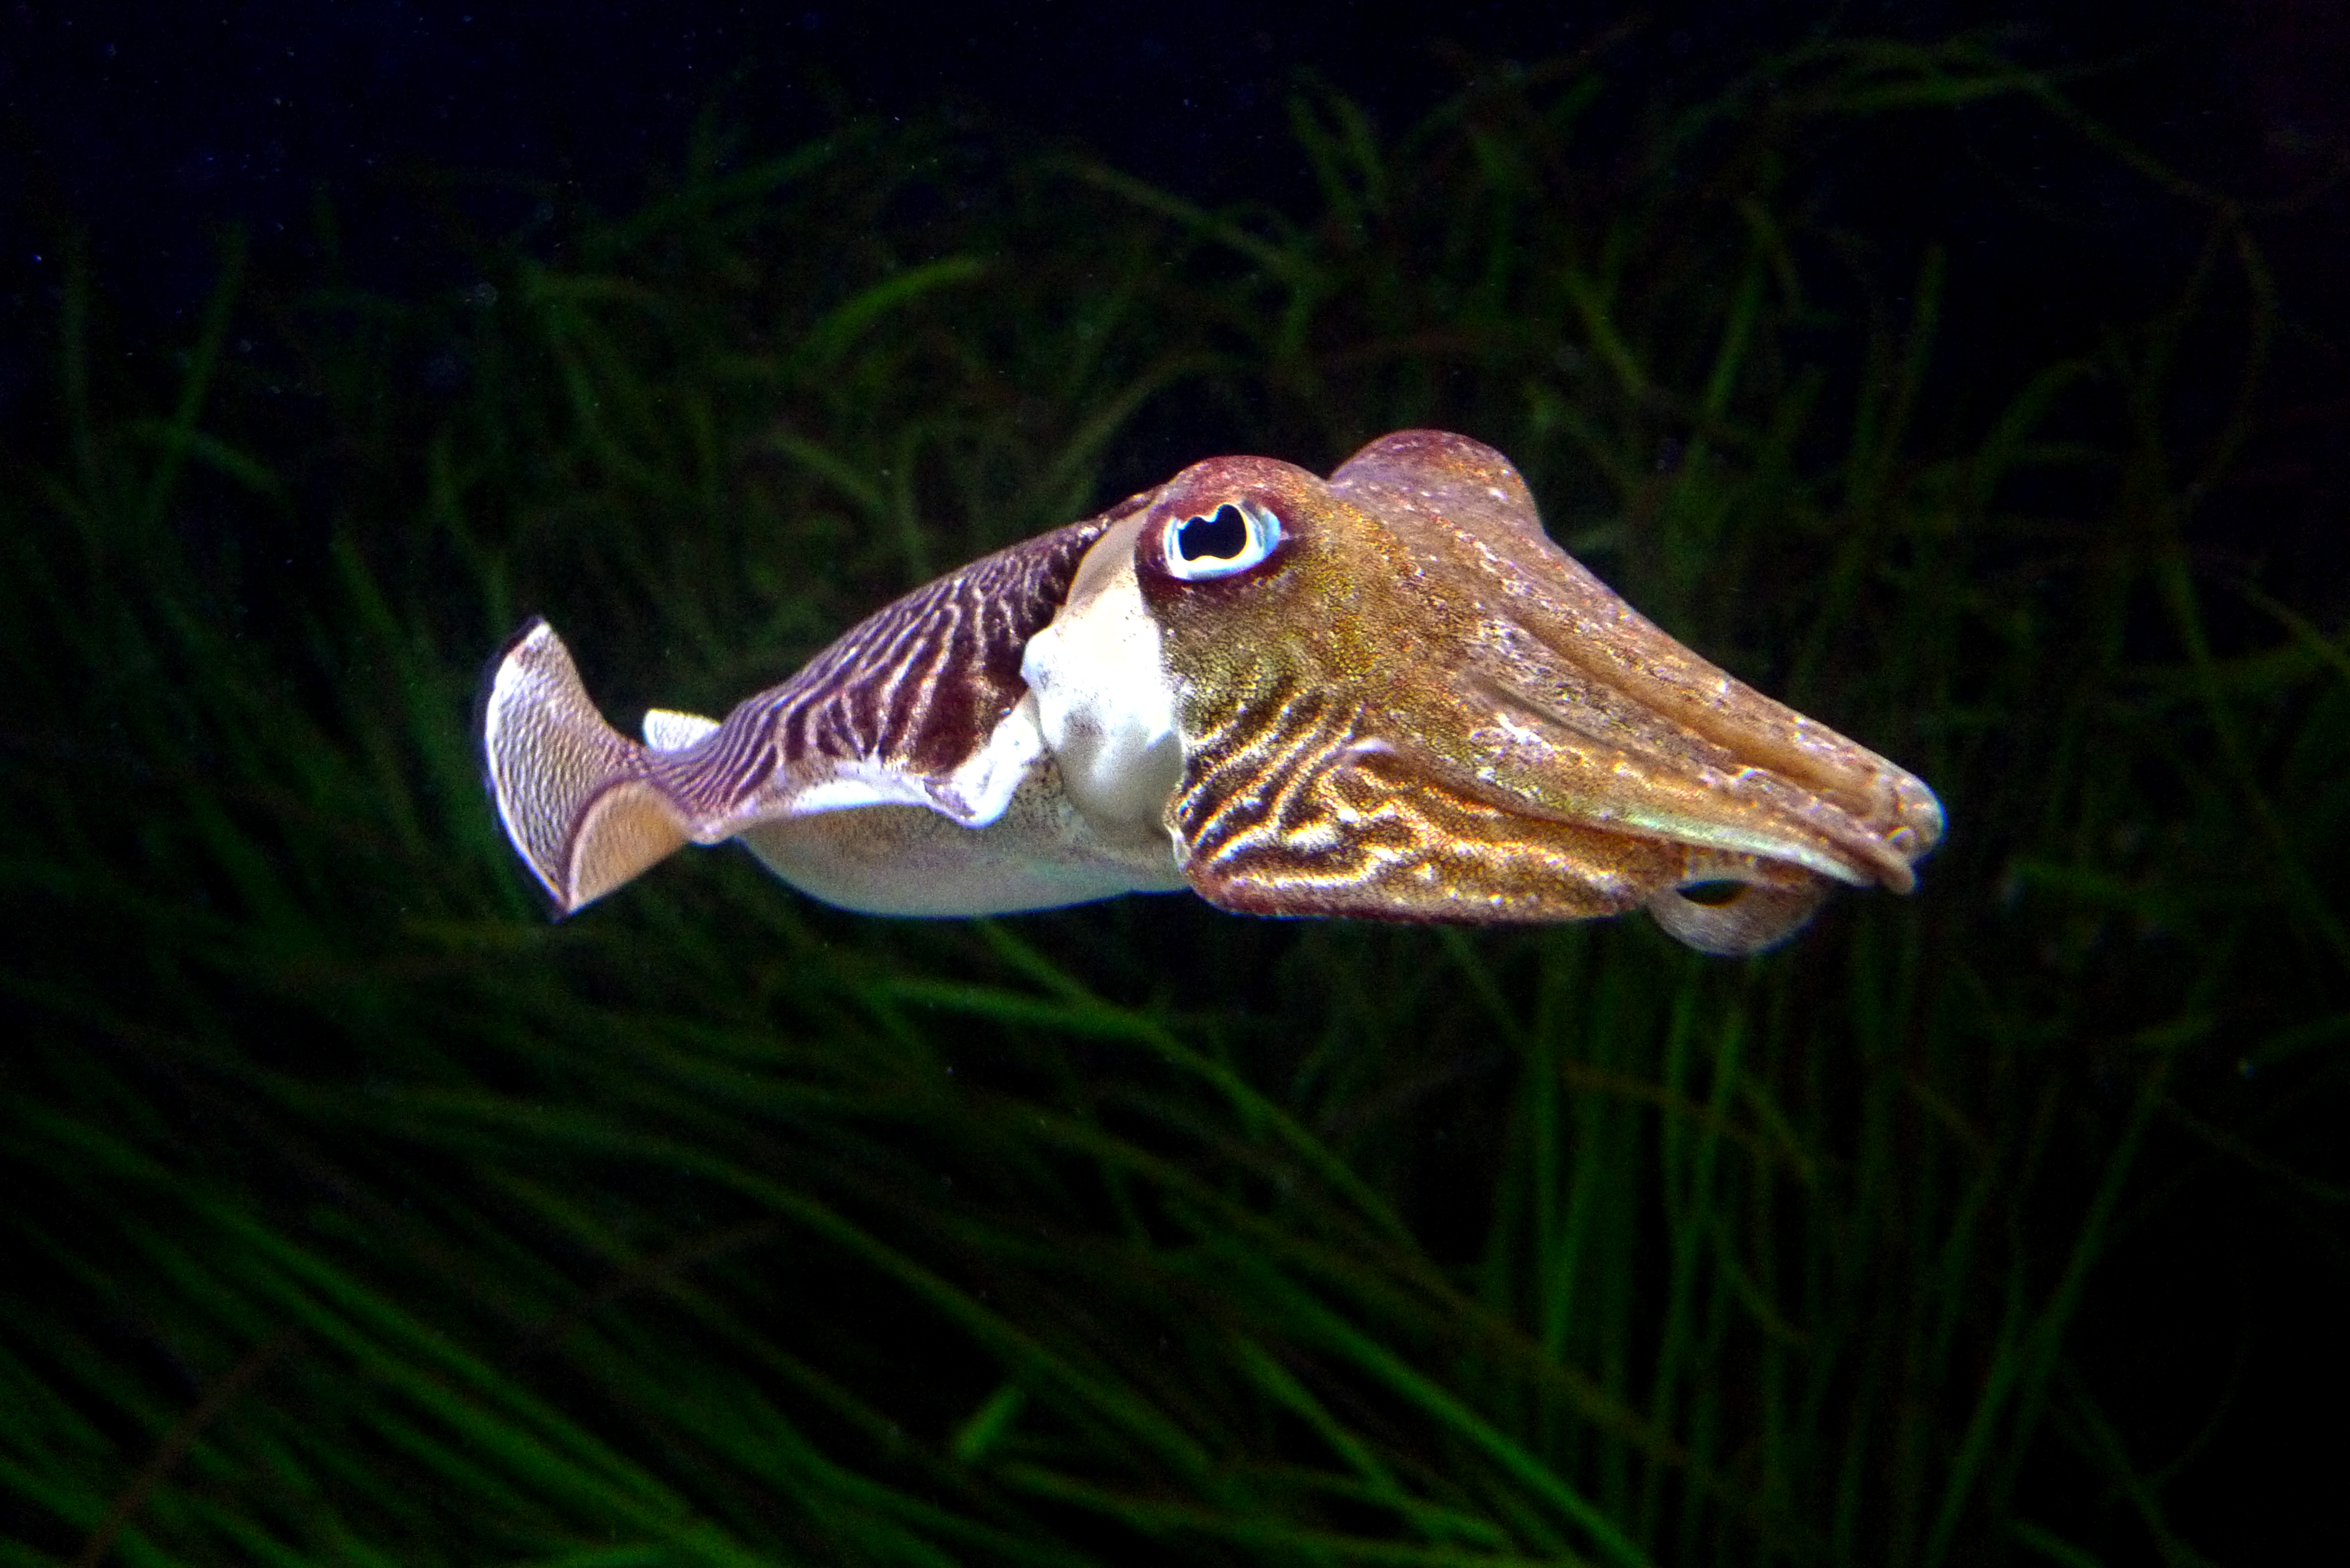
They told me that although things have been slow going, they are selling enough product to train and hire another round of women this fall, plus they hope to hire one of their trainees as the new workshop manager to run things when they are travelling around Senegal or back to the UK. Finally, the fact that foreign founders don’t put themselves front and center on their social media is a good sign that it’s more about the impact than the image. See, I told you the experience was connected to the ethics. Now, let’s make a cuttlefish ring!
Did You Say “Cuttlefish Ring”?
The silversmithing workshop takes place for 5 hours over two sessions (2.5 x 2), and you get to choose if you want to do the sand technique or something called the “cuttlefish” technique. I looked at examples from the Instagram, and decided the cuttlefish was more my style, but I also was deeply intrigued by why it was named that. I guessed (correctly) that the sand technique was casting in sand, which although I’ve never done personally, I see videos of people making jewelry that way on TikTok and Facebook all the time because the algorithm knows I love watching people craft things in condensed 1-2 minute chunks. I very purposely didn’t investigate this jewelry technique before going because I wanted to be surprised, so everything I’m sharing here, I learned at or after the workshop.
What is a cuttlefish? One of the first questions asked in the workshop was quite reasonable, since although most of us have likely seen these creatures in a nature documentary, we may not know them by name. They are similar to squid, but have a calcium carbonate “bone” (a cuttlebone) that helps them keep their shape and change their buoyancy. When they die, the hard internal structure is left behind and they wash up on shore by the dozens. Cuttlefish have natural predators, but humans enjoy them too for both their high quality ink (that squid ink pasta that looks so pretty in photos?) and for their meat, which is an excellent substitute for calamari. You may have even seen cuttlebone in a pet shop or a parakeet cage before since they are often placed in with the birds to supplement their calcium intake and give them something to gnaw on besides their owners fingers.
Why are we using it to cast metal? The cuttlebone technique may be one of the older metal casting styles around, coming originally from the Mediterranean and traveling upward into Europe. There are examples of belt buckles made in this way in Germany dating back some 1200 years or more, but some antiquarians think the technique could be as much as 5,000 years old.
It’s super easy to carve or press shapes into it, and it’s harder on one side than the other, so the “outside” stays in a solid shape, while the softer “inside” is carved out. But that’s not really it. The way that the layers of calcium carbonate – also called aragonite – form beautiful wave-like patterns in the finished product, not unlike tree-rings. No two are ever alike because it’s an organic process that preserves the life of an organism in precious metal. Neat! The cuttlebone that Green Wave uses is generally that which has washed up on the beaches of Senegal and other neighboring West African countries.
Workshop Session 1
For the casting technique, you need two smaller or one larger (or I guess if you want a Texas sized belt buckle, two larger) cuttlebones. Green Wave had cut ours in half before we arrived. We then learned about the hard and soft side, and how to sand the soft side flat until the two pieces could press together as tightly as possible. That was the basis for our mold. We all sifted through a bowl of rings, mostly made of brass or steel, in order to find the size and style we wanted to use. The model rings were plain and unadorned, just to get the general shape. They told us it’s better to choose a slightly smaller model (foreshadowing) since there will be a later step that files some silver out of the interior. I chose a square ring in a size that would fit well on my index and middle fingers.
With the rings chosen, we learned how to carefully but forcefully press the ring halfway into the newly flattened surface of one of our cuttlebone halves. This is harder than it should be, given how soft the material is. I accidentally broke part of my cuttlebone while pressing in, and thankfully it was a chunk off the larger half towards the top, and we were able to smooth out my initial impression with more sanding and move the placement further down. Unfortunately for me, the narrow end of the cuttlebone is harder and more dense, so instead of a smooth pressing, I had to take the ring out and remove the compressed aragonite dust with a paintbrush like an archaeologist.
Once I got the ring model halfway submerged, I added some ball bearings at two corners (to help align the two sides of the mold) and then gently placed the second half again and pressed some more until the two halves touched and the ring model was completely encased. The dust or powder left behind can also be used to polish jewelry, so doesn’t have to go to waste.
The next step was definitely the most interesting because we took our archeology paintbrushes and went back to the gentle and painstaking work of removing all the powdered remains from the mold. When I first removed my model, the indentation was smooth, and I still hadn’t really realized the link between the cuttlebone and the finished jewelry I’d seen in their shop. Then as I brushed away the compacted dust, the beautiful striations of the cuttlebone began to emerge like layers of sediment in rock. The tiny intricate lines were mesmerizing, and more beautiful than anything I could have thought to carve on my own. The tiny brush was uncovering a lifetime of growth a few grains of powder at a time.
Step 4 was to carve the funnel via which the molten silver would enter the mold. This part was actually the most nerve wracking because we had all spent a painstaking 90 minutes creating the ring mold, and a misstep in the funnel could wreck the whole design. However, our teachers were very patient and kind, encouraging us to take smaller cuts if we felt nervous, and never once made us feel rushed or stressed. The funnel was more technical than I expected since it not only needed to direct the silver into the mold without disrupting the natural cuttlebone pattern, it also had to work with gravity to force the silver all the way to the bottom, and with shape, since silver doesn’t like to flow at sharp angles.
The very last step was to create teeny tiny air vents that would lead from the bottom of the ring mold to the top, once again working with physics. The silver will flow, pushing the air down, meaning the channels have to start at the bottom, but air prefers to go up, so channels that run down or to the side may invite the heavier molten metal, leaving air bubbles in the ring. These final tiny tunnels are made by gently smoothing away a groove that aligns with the existing grooves of the cuttlebone pattern, then arcing it upward once it’s a few mm away from the ring impression. Then end result looks a little like a daddy longlegs spider got smooshed in your cuttlebone. After a final brushing to get any lingering loose powder out, we put our two halves together, assuring perfect alignment with the ball bearings, then taping them together tightly with masking tape.
The Molten Silver
It was a little disappointing to realize I would not be pouring the molten silver myself, but it’s probably for the best. Considering how long it takes to master the act of carefully pouring anything into a tiny space without spilling, the addition of molten to the equation means bulky gloves, long tongs, and heavy protective clothing, not to mention huge liability. Would I have liked to pour it myself? Yes, but I’m also happy knowing that one of the Senegalese trainees will be doing the pouring on my behalf. Also, since it takes a long time to heat the silver to 1000+ degrees Celsius, and then also cool off enough to go in the cooling bath, the employees do this part between the two workshop sessions. They were, however, kind enough to take some unique video and photos of my ring during the process.
I was surprised at how small the workspace actually is. The smelter which heats the silver is no bigger than a Keurig, then they have a small crockpot to keep the food grade acid that is used to cool and clean the silver, and a cake pan full of dirt that holds the mold in place and provides a safe splash zone. They make the pour look so easy, but I am assured it is something which requires a lot of practice not only not to make a molten silver mess, but to make sure no air bubbles mar the finished product.
When the mold comes apart, you can see the scorched cuttlebone and all the excess silver. The large chunk on top is the funnel and gets sawed off (though part of me could not help but think that it might be fun to deliberately make a funnel that could stay as a chunky decoration). The wispy lines are the air vents, which are so thin and delicate, they can be broken off by hand. By the time we all returned for our second and final workshop, the rings had been cooled & sawed, and were ready for the finishing touches.
Workshop Session 2
Disclaimer, I took far fewer photos in the second workshop because it was a lot more intensive andfocused work. During the the first workshop I had a lot of breaks and down time where it was easy to grab my phone for some photos, but during the second, my hands were busy busy busy.
The very first thing I noticed was the insane amount of texture that my ring had captured from the cuttlebone. One of the reasons I chose a square ring was that I liked the side pattern more than the top/bottom pattern and I wanted to maximize the texture variety of the finished product.
Next, we learned the 4 stages of the jewelry finishing process: 1) brass brushing, 2) coarse filing, 3) fine filing, 4) polishing. The brass brushing is a way to remove any other bits that stuck to the ring during the molding process or acid bath. It’s the most aggressive scrub brush you could imagine, and it’s very important to keep the ring wet while brushing. It can be done on and off during both the filing stages, but has to be finished before the polishing. I thought my ring was fairly bright silver compared to the others in the pile, but a little brass brush scrub revealed even shinier metal.
The filing is both physically grueling and mentally satisfying. We start off working on the area where the funnel was cut off since it’s the largest. For people with round rings, this was a smaller area, and involved making the cut blend smoothly into the rest of the ring. For me and the other person with a square ring it meant filing one entire side completely smooth. I toyed with the idea of doing just the part that the funnel had attached to, but it didn’t look as good as the examples they showed us of the fully smoothed side. They showed us two methods for filing, one using a wooden brace attached to the table, and the other using your own foot (a more traditional method that probably works better if you have calluses).
Once we had the funnel edge smoothed, we then worked the interior. Again, at first, I thought I might like to leave some texture on the inside, but as I worked the sharp edges down, and slid the ring on to test size and comfort, I realized that the flatter interior was more comfortable. So, in addition to smoothing one whole exterior edge, I did the interior as well.
They had advised us to choose rings which were slightly small for the mold making process since filing would give it extra size, but mine was still a bit snug once the interior was smooth flat, so they offered to put it on the ring stretcher. This when the its-not-a-disaster-its-a-bonus-lesson accident happened. My ring cracked. I didn’t know silver could crack! I knew that things which were forged or joined with solder might crack due to flaws in the material or process where two different things connected, but I thought poured silver would be like poured concrete and just — be all one piece? But something to do with the physics of the liquid metal means that sometimes the spot at the funnel where the two sides of the pour meet can be a bit weak.
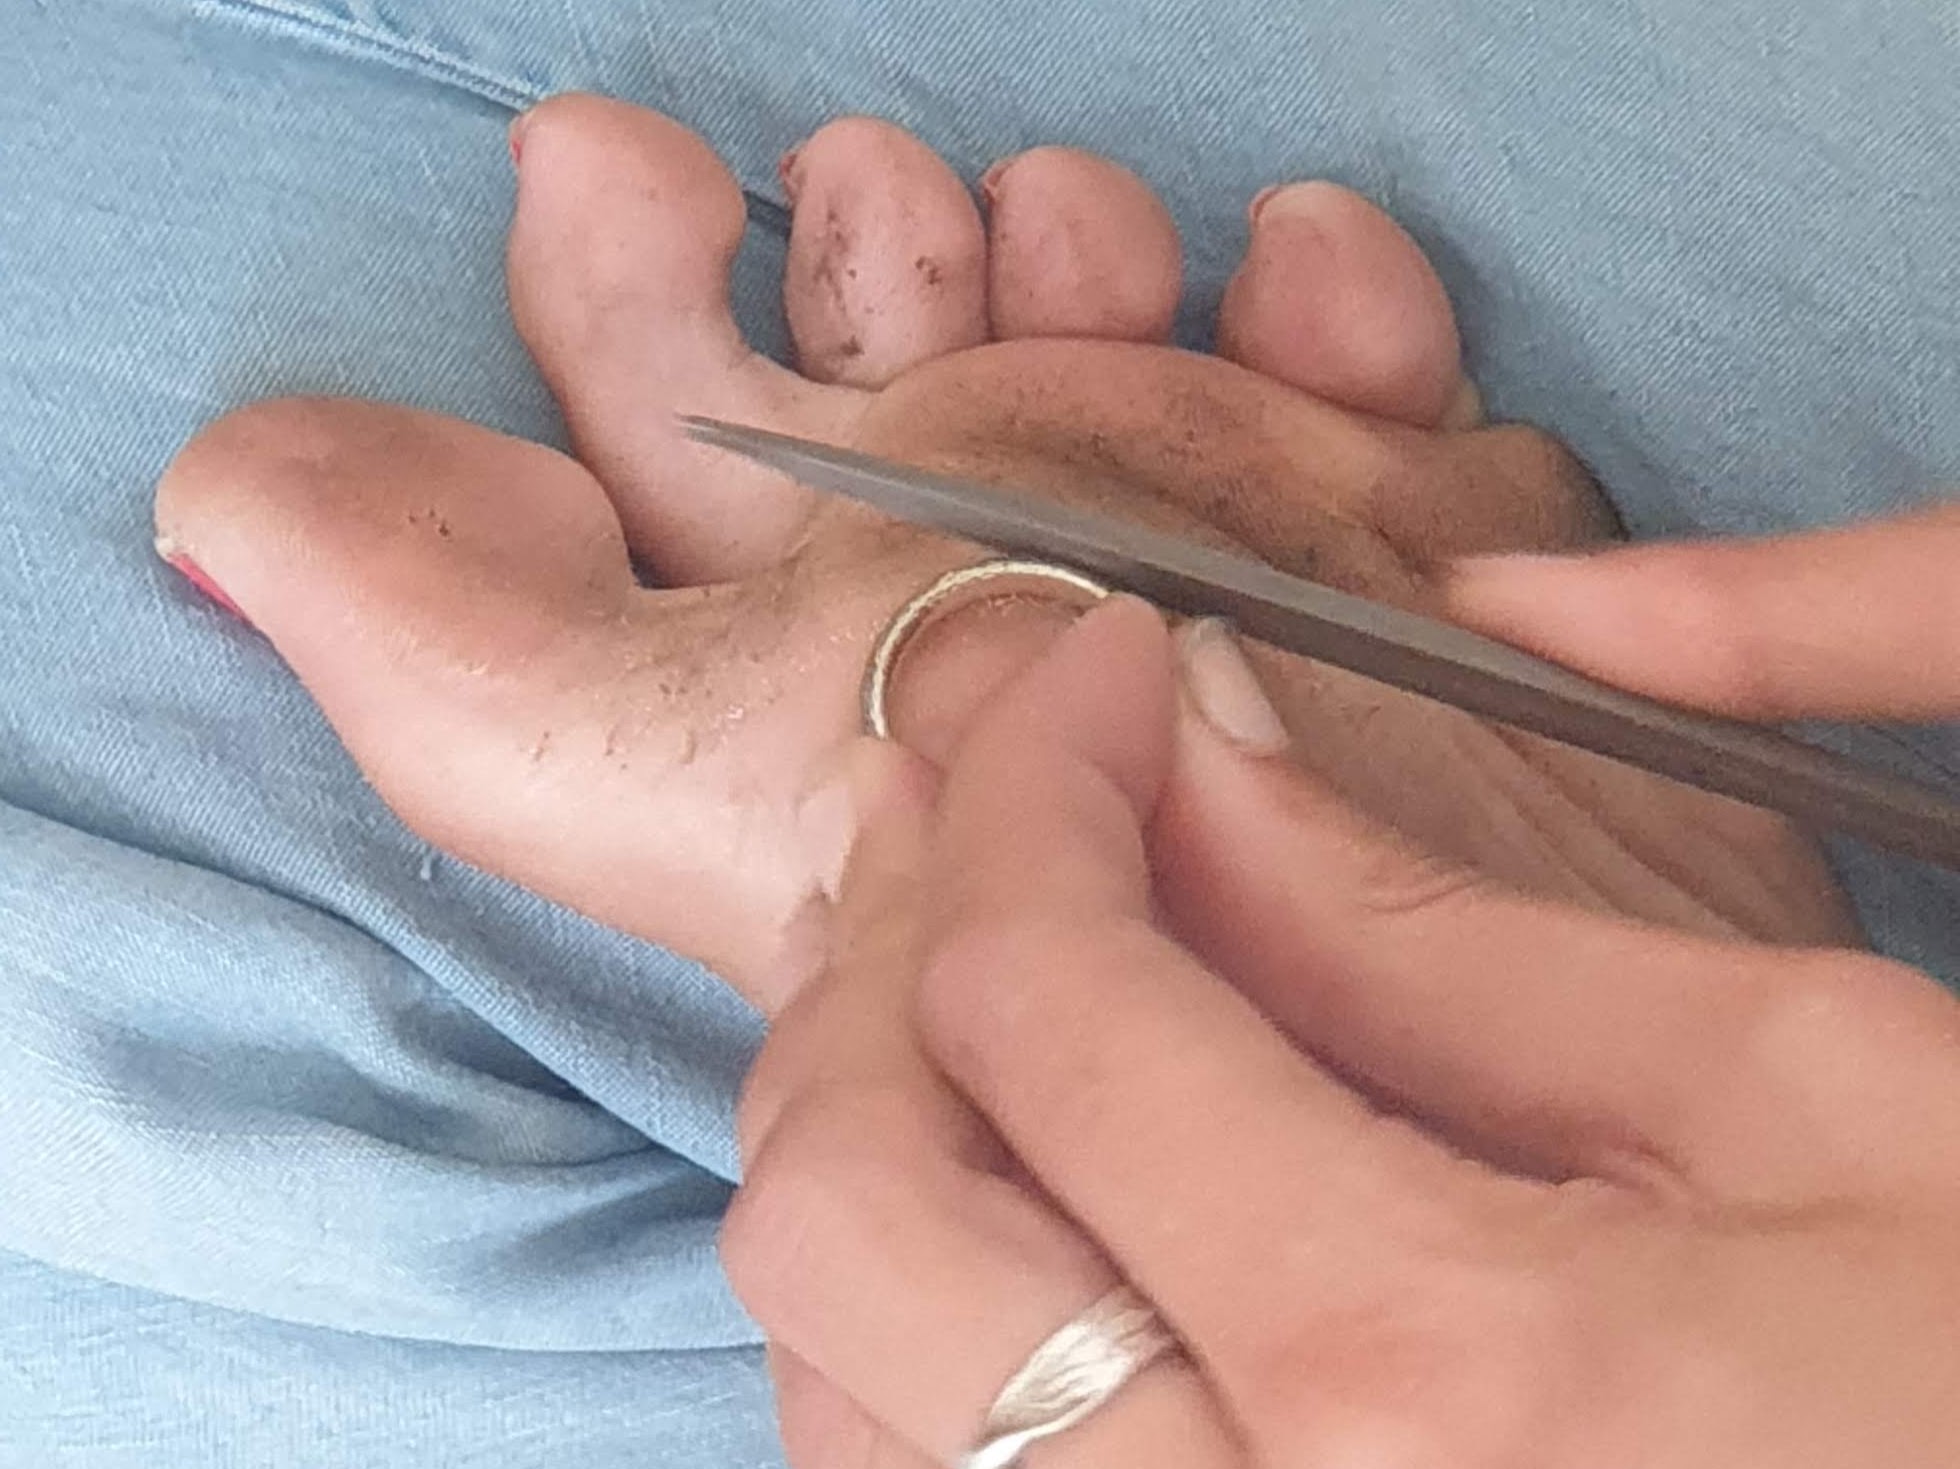
In the end, it’s best that the ring showed this flaw before I left the shop because they had all the tools on hand to fix it. I got to watch as she broke out two types of solder and a mini blow torch. I’ve seen and even used (a long time ago) solder for electronics, but no one cares if electronics are pretty, so I associate solder with lumpy grey metal. This silver solder is a copper silver alloy that matches the ring and even with a hairline crack, the heat causes the solder to sort of suck up into the flaw, like a straw, aka capillary action. So when the temperature gets into the goldilocks zone, you can see the lump almost vanish. A cooling acid bath and a little filing, and there’s no sign of the repair.
The fine filing is done with a series of smaller files to work on any tiny edges which might be left from the air vents or an inexact alignment of the two halves of cuttlebone. It’s almost entirely invisible unless you are looking with a zoom lens or magnifier, but taking the very tiny square or sharp edges and making them rounded and smooth has a big impact on the comfort while wearing and keeps the ring from snagging on skin or clothing.
Last but not least is a polishing process that engages 4-6 types of sandpaper at ever increasing fineness from 240 to 3000, ending with a silver polishing cloth. The end result is that your filed areas have a mirror shine, and your textured areas are free of poking-out bits.
I’m happy with my finished product as both a piece of jewelry and a memory. It’s a unique souvenir of my time in Dakar which encapsulates many aspects of my experiences here: the chronic quest for cultural exchange, the inescapability of toubab spaces, the long road to understanding my ethical role in aid-centered activities outside my own country, and my struggle to find meaningful projects. Plus, it’s pretty.